Sprucing up your mailbox for winter is a fun way to bring warmth to your home. Start with a whimsical wreath—grapevine or foam as your base works best—then layer on pinecones and faux snowflakes. Drape a cozy blanket over the mailbox post for charm, and consider stacking logs nearby for that rustic appeal. You can also add a little personality with charming holiday signs. Stick around and I’ll share even more creative ideas to keep your winter decor vibrant.
Design Highlights
- Create whimsical wreaths using winter-themed embellishments like pinecones and faux snowflakes for a festive door display.
- Drape a cozy knitted throw over the mailbox post, secured with twine, for a warm touch.
- Use seasonal signs with cheerful phrases to add personality and joy to your mailbox decor.
- Decorate with snowy arrangements of painted pinecones and greenery for an eye-catching display.
- Enhance your mailbox with garland decorations and winter-themed covers to transform your front yard into a winter wonderland.
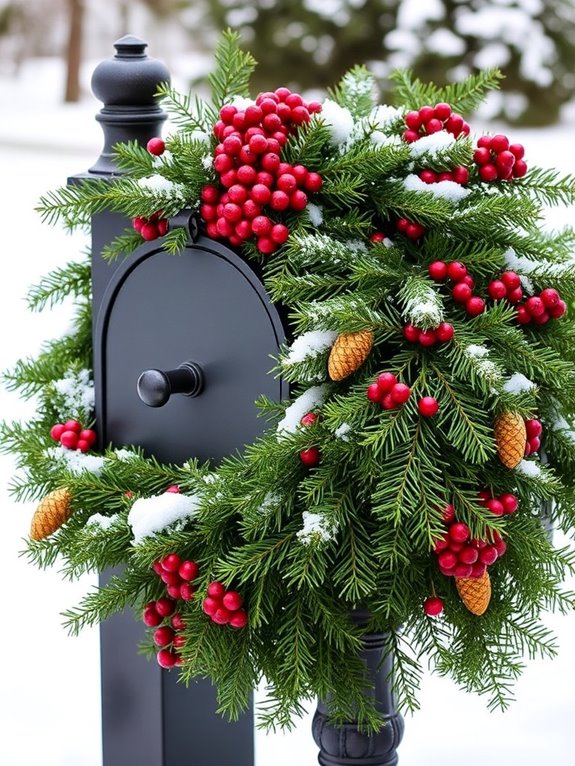
Whimsical Winter Wreaths
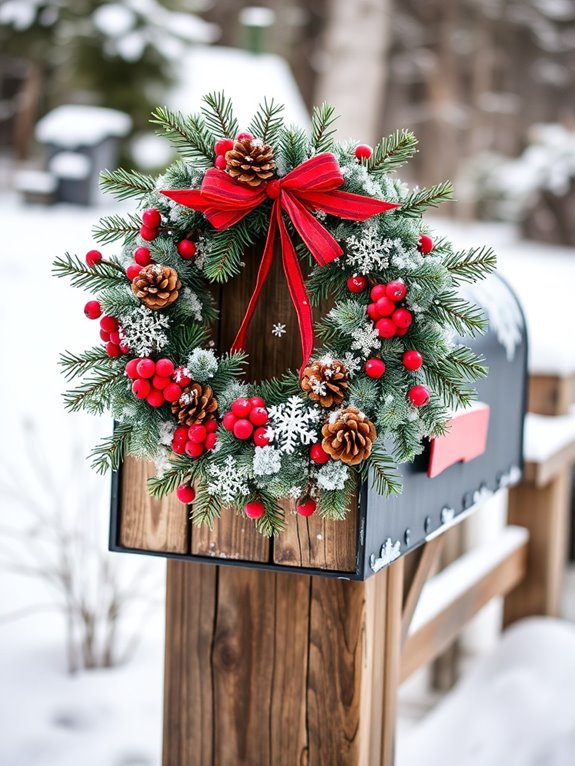
When winter rolls around, I can’t help but think that our front doors could use some pizzazz, and that’s where whimsical winter wreaths come in. Imagine this: a frosty door adorned with a wreath that sparkles like fresh snow. You’ll want to start with a sturdy base—grapevine or foam works wonders. Then, gather winter-themed embellishments: think pinecones, faux snowflakes, and maybe a cheeky little snowman ornament. Arrange them neatly, but don’t stress about perfection; a little asymmetry adds character. Secure everything with hot glue and a lovely bow at the top. Finally, hang it on your door, and voila! You’ve got a festive welcome that’ll make your neighbors envious. Trust me, it’s way more fun than just slapping on a plain old wreath!
Cozy Blanket Accents
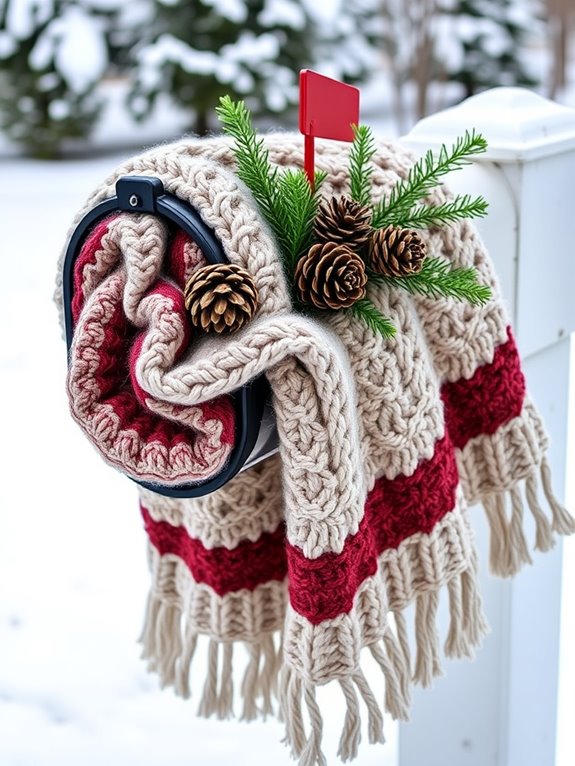
As you immerse yourself in winter decorating, don’t overlook the magic that cozy blanket accents can bring to your mailbox area. Imagine this: a warm, knitted throw draped over your mailbox post. I know, it sounds a bit extra, but trust me! Use a soft, muted color palette like deep reds or creamy whites to evoke that cozy vibe.
Secure it with twine or ribbon—nothing fancy, just keep it simple. Add a cute little tag that says “Let it Snow” or “Warm Wishes.” If you’re feeling adventurous, throw in some faux fur trim for that extra snuggle factor. Just remember, the goal is to create a welcoming feel, so don’t be afraid to show off your personality!
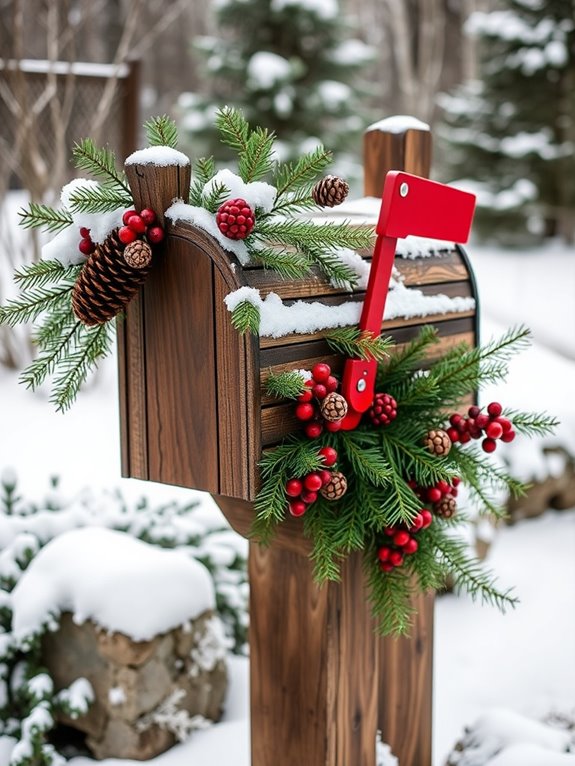
Snowy Pinecone Arrangements
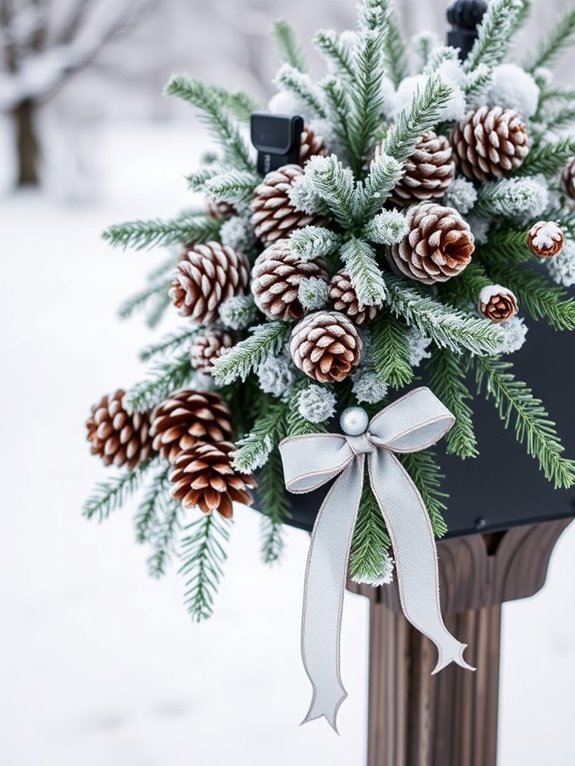
Snowy pinecone arrangements can transform your mailbox decor into a winter wonderland, and I can’t wait to show you how! First, gather some pinecones — the bigger, the better. Next, grab a can of white spray paint and give those beauties a light coating. You want them to look frosty, not like they just survived a snowstorm! While they dry, find a sturdy base like a wooden box or a decorative basket. Arrange your pinecones in clusters, adding some faux snow or glitter for that extra sparkle. If you’re feeling adventurous, toss in some greenery like cedar or holly. Trust me, it’ll give your mailbox that “wow” factor. Just don’t blame me when your neighbors start asking for your secrets!
Festive Garland Wraps
Garlands are the unsung heroes of festive decor, and wrapping one around your mailbox can instantly elevate its winter charm. Start by choosing a garland that fits your style—think greenery, berries, or even twinkling lights. Grab a good length; you’ll want enough to wrap it around at least twice. Secure one end with floral wire, because trust me, tape just won’t cut it in the winter weather. As you wrap, be sure to space it evenly, letting it drape gracefully. If you’re feeling fancy, add little accents like pinecones or ornaments. Just remember to step back and check your work—no one wants a lopsided mailbox! And hey, if it looks a bit wobbly, just call it “rustic charm.”
Charming Holiday Signs
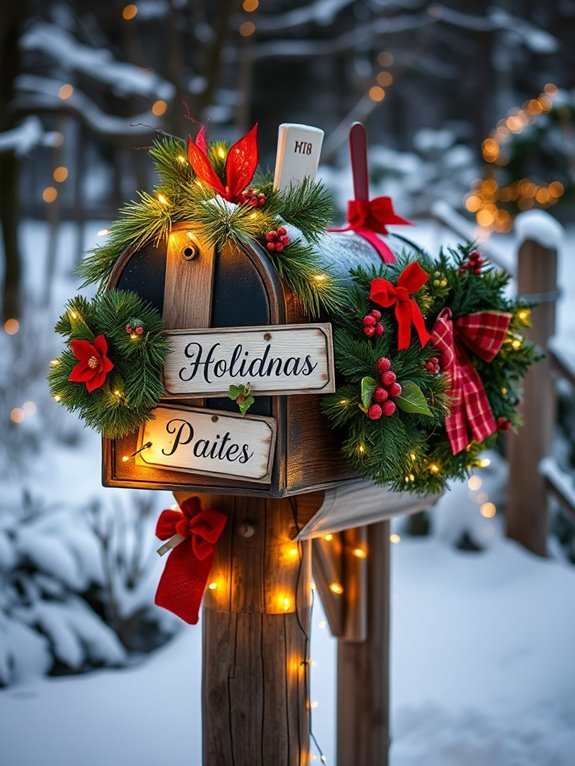
If you want to bring a little extra cheer to your mailbox this winter, charming holiday signs are the perfect way to do it. I love how these signs add personality and warmth. Look for wooden or metal signs with fun phrases like “Let it Snow” or “Joy to the World.” You can even find ones shaped like snowmen or reindeer!
Hang your sign from the mailbox post or attach it directly to the box with some twine. Just be careful not to cover the mailbox number—trust me, you don’t want your packages going to the neighbor! And hey, if you’ve got kids, let them help with the decorating; it’s a great way to make memories together while spreading holiday joy.
Glittering Fairy Lights
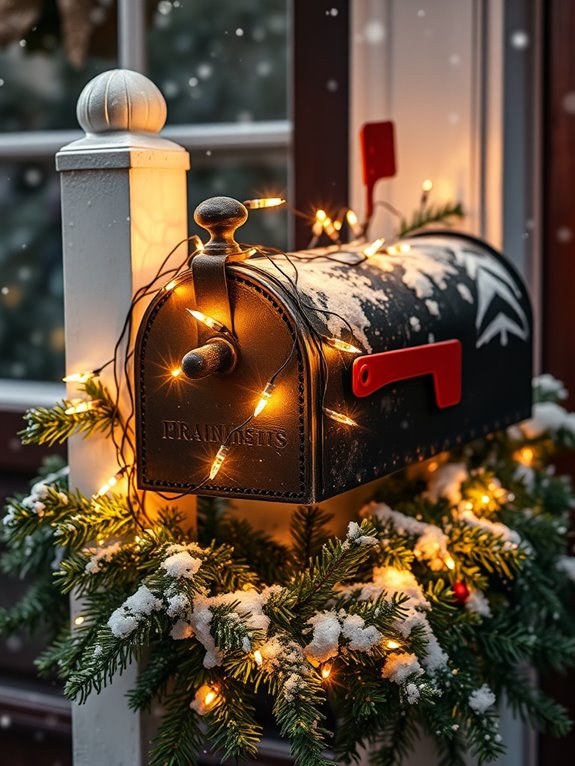
Nothing sets a cozy winter scene quite like glittering fairy lights wrapping around your mailbox. Trust me, it’s a game-changer! First, pick a set of battery-operated fairy lights—those pesky cords can be a real hassle. I always go for warm white; it gives off that inviting glow. Next, start at the base of your mailbox and work your way up, spiraling the lights around it. If you’ve got some extra lights, drape them down the post for added charm. Secure them with clear tape or little clips; I’ve learned the hard way that a gust of wind can turn your masterpiece into a tangled mess. Finally, step back and admire your work—you’ll feel like a holiday decorating pro!
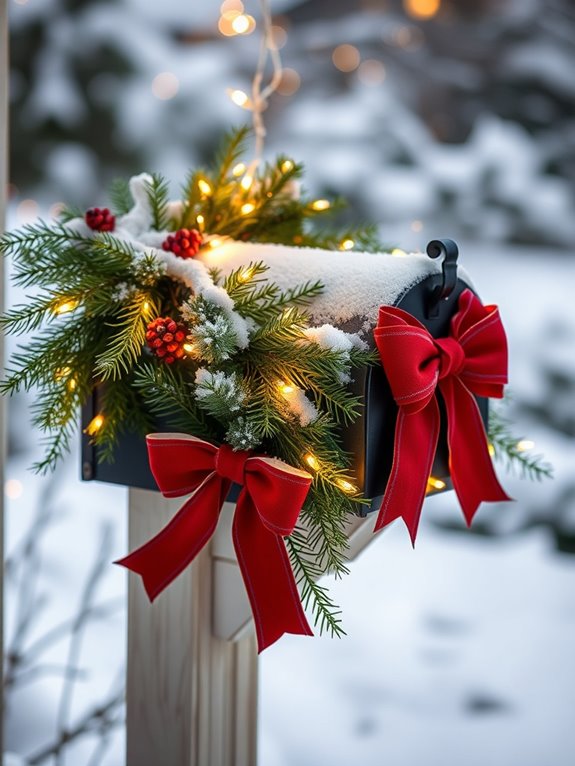
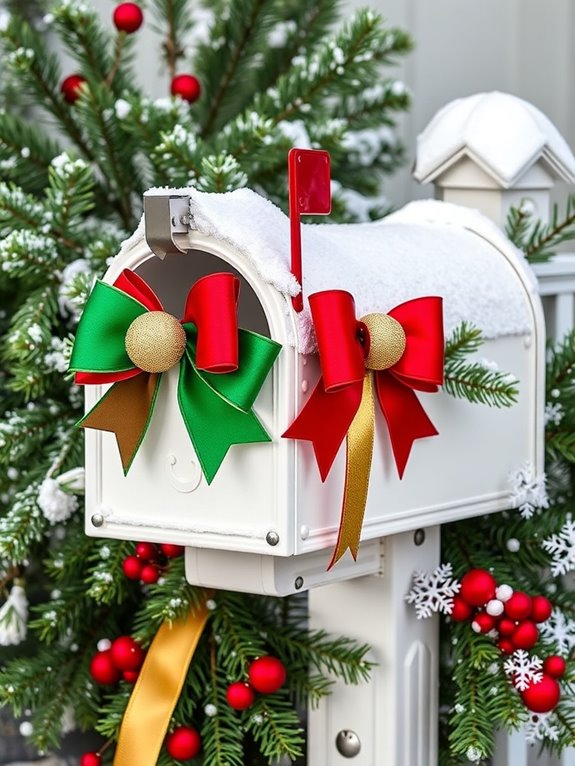
Seasonal Bow Embellishments
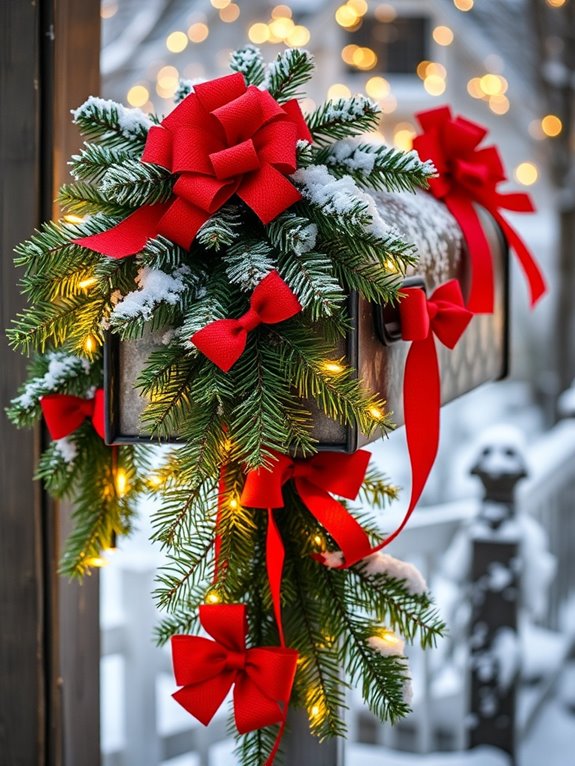
While you’re channeling your inner holiday decorator, seasonal bow embellishments can elevate your mailbox from ordinary to extraordinary. Trust me, a well-placed bow can make a world of difference! Grab some wired ribbon—it’s easier to shape and will hold its form. Measure a length about three times the width of your mailbox, then make a loop and twist it into a bow. Secure it with floral wire or string. If you’re feeling adventurous, layer different colors or patterns for a fun, textured look. Oh, and don’t forget to add a touch of greenery or some faux berries to make it pop! Remember, even if your bow ends up slightly crooked, it’s still going to bring joy to anyone who sees it.
Rustic Wooden Boxes
After you’ve nailed those festive bows, it’s time to add a touch of charm with rustic wooden boxes. You can find these at craft stores or even repurpose old wooden crates. First, give them a good clean—trust me, no one wants dust bunnies crashing the party. Next, choose a winter theme; think pinecones, faux snow, or even some twinkling fairy lights. Layer in some greenery, like eucalyptus or holly, for that fresh touch. Don’t be shy—mix and match sizes for visual interest! If you’re feeling adventurous, paint or stencil on some seasonal words. Just remember, it’s about having fun. If it looks a bit wobbly, just say it’s “rustic character,” and you’re golden!
Plush Winter Animals
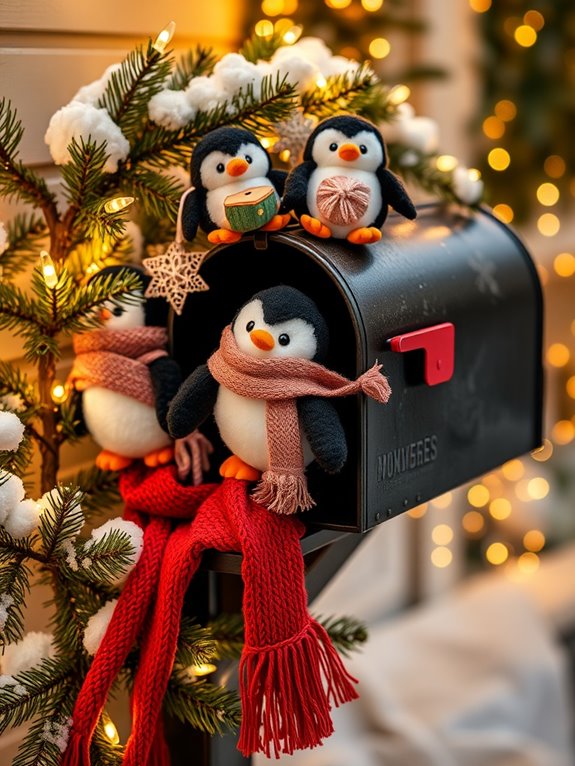
Who can resist the charm of plush winter animals? I certainly can’t! These adorable creatures can instantly cozy up your mailbox. Start by choosing a few plush critters, like a snowman, penguin, or even a cute polar bear. You can find them at craft stores or online, often on sale after the holidays—score!
To attach them, use strong, weatherproof glue or a sturdy wire. Just remember, you want them to withstand the elements without blowing away. For a whimsical touch, arrange them around your mailbox or even hang them from a garland.
Trust me, your neighbors will smile every time they pass by. Plus, it’s a fun way to show off your holiday spirit without going overboard.
Brightly Colored Bows
If you’re looking to brighten up your mailbox after the plush winter animals have made their cozy introduction, brightly colored bows are your new best friend. Trust me, they can transform your mailbox from drab to fab in a snap! Grab some vibrant ribbon—think reds, blues, or even sparkly gold. Cut a length that’s about three times the width of your mailbox; you want it to stand out, not get lost in the snow!
Now, tie a big ol’ bow like you’re wrapping a gift for a friend (or a present for yourself, no judgment here). Secure it on the mailbox with some floral wire or strong tape. It’s that easy! Your mailbox will be the talk of the neighborhood, and you’ll feel like a holiday decorating pro.
Frosted Branch Displays
While you might think of winter as a time for stark, bare branches, I’m here to tell you that frosted branch displays can bring a touch of elegance to your mailbox decor. Envision this: you grab a few branches from your yard or local craft store. Don’t worry; I won’t judge if you “borrow” from nature! Spray them with white or silver paint to mimic frost—just don’t inhale too deeply; I learned that the hard way. Once they’re dry, arrange them in a vase or directly by your mailbox. Add a few sparkly ornaments or twinkling lights for flair. This simple touch transforms your mailbox into a winter wonderland, proving that even the simplest decor can make a big statement!
Stacked Logs for Rustic Charm
Stacked logs can add a cozy, rustic charm to your mailbox decor, and trust me, it’s easier than it sounds! You don’t have to be a lumberjack to pull this off. Here’s how to create your own log display:
- Gather Logs: Find logs of varying sizes. Don’t worry if they’re not perfect; character is key!
- Clean Them Up: Remove any bark, dirt, or bugs. I learned this the hard way—nobody wants a bug surprise.
- Stack Strategically: Arrange the logs in a staggered formation for visual interest. Think balance, not chaos!
- Accessorize: Add a festive ribbon or pinecones at the top. It’ll look like you planned it all along!
Trust me, your mailbox will look inviting and unique!
Winter-Themed Mailbox Covers
Winter-themed mailbox covers can instantly transform your front yard into a winter wonderland, and trust me, they’re a game changer! Imagine this: a vibrant, snowy scene greeting your mail carrier and neighbors. To pick the perfect cover, consider designs featuring snowflakes, cozy cabins, or even playful penguins. Measure your mailbox first—no one wants a cover flapping like an overenthusiastic flag!
Once you’ve got your cover, simply slide it over your mailbox. Many are magnetic, so they’ll cling on like a toddler to a cookie jar. If you’re feeling extra crafty, you could even make your own! Just grab some fabric, paint, and a dash of creativity. Trust me, you’ll be the envy of the block!
Personalized Holiday Messages
Adding a personalized holiday message to your mailbox can really elevate your winter decor from cute to downright charming. Trust me, it’s like giving your mailbox a warm hug! Here’s how you can do it:
- Choose Your Message: Think of a phrase that resonates with you—like “Warm Wishes” or “Happy Holidays, Friends!”
- Select Your Material: Use weather-resistant vinyl or wooden plaques. I once tried paper, and let’s just say it wasn’t pretty after a snowstorm!
- Design It: Get creative! Use stencils or even hand-letter it if you’re feeling artsy.
- Secure It Well: Make sure it won’t fly away in a blizzard. I learned that the hard way!
With these steps, you’ll have a mailbox that spreads cheer all winter long!